rmlint finds space waste and other broken things on your filesystem and offers
to remove it. It is able to find:
|
|
Key Features:
|
|
|


User manual¶
Although rmlint is easy to use, you might want to read these chapters first.
They show you the basic principles and most of the advanced options:
Installation¶
Many major Linux distribution might already package rmlint – but watch out for
the version. If possible, we recommend using the newest version available.
If there is no package yet or you want to try a development version, you gonna
need to compile rmlint from source.
Dependencies¶
Hard dependencies:¶
- glib \(\geq 2.32\) (general C Utility Library)
Soft dependencies:¶
- libblkid (detecting mountpoints)
- libelf (nonstripped binary detection)
- libjson-glib (parsing rmlint’s own json as caching layer)
Build dependencies:¶
- git (version control)
- scons (build system)
- sphinx (manpage/documentation generation)
- gettext (support for localization)
Here’s a list of readily prepared commands for known operating systems:
Fedora \(\geq 21\):
$ yum -y install pkgconf git scons python3-sphinx gettext json-glib-devel $ yum -y install glib2-devel libblkid-devel elfutils-libelf-devel # Optional dependencies for the GUI: $ yum -y install pygobject3 gtk3 librsvg2There are also pre-built packages on Fedora Copr:
$ dnf copr enable eclipseo/rmlint $ dnf install rmlintSince Fedora 29 we also have an official package.
ArchLinux:
There is an official package in
[community]here:$ pacman -S rmlint
Alternatively you can use
rmlint-gitin the AUR:$ pacman -S pkgconf git scons python-sphinx $ pacman -S glib2 libutil-linux elfutils json-glib # Optional dependencies for the GUI: $ pacman -S gtk3 python-gobject librsvgThere is also a PKGBUILD on the ArchLinux AUR:
$ # Use your favourite AUR Helper. $ yaourt -S rmlint-gitIt is built from git
master, not from thedevelopbranch.
Debian / Ubuntu \(\geq 12.04\):
Note: Debian also ships an official package. Use the below instructions if you need a more recent version.
This most likely applies to most distributions that are derived from Ubuntu. Note that the
GUIdepends onGTK+ >= 3.12! Ubuntu 14.04 LTS and earlier still ships with3.10.$ apt-get install pkg-config git scons python3-sphinx python3-nose gettext build-essential # Optional dependencies for more features: $ apt-get install libelf-dev libglib2.0-dev libblkid-dev libjson-glib-1.0 libjson-glib-dev # Optional dependencies for the GUI: $ apt-get install python3-gi gir1.2-rsvg gir1.2-gtk-3.0 python-cairo gir1.2-polkit-1.0 gir1.2-gtksource-3.0
macOS
rmlintcan be installed via homebrew:Prerequisite: If homebrew has not already been installed on the system, execute:
$ /usr/bin/ruby -e "$(curl -fsSL https://raw.githubusercontent.com/Homebrew/install/master/install)".
With homebrew installed, execute:
$ brew install rmlint
See also this issue for more information on the homebrew formula.
FreeBSD \(\geq 10.1\):
$ pkg install git scons py27-sphinx pkgconf $ pkg install glib gettext libelf json-glib
Send us a note if you want to see your distribution here or the instructions
need an update. The commands above install the full dependencies, therefore
some packages might be stripped if you do not need the feature
they enable. Only hard requirement for the commandline is glib.
Also be aware that the GUI needs at least \(gtk \geq 3.12\) to work!
Compilation¶
Compilation consists of getting the source and translating it into a usable
binary. We use the build system scons. Note that the following instructions
build the software from the potentially unstable develop branch:
$ # Omit -b develop if you want to build from the stable master
$ git clone -b develop https://github.com/sahib/rmlint.git
$ cd rmlint/
$ scons config # Look what features scons would compile
$ scons DEBUG=1 # Optional, build locally.
# Install (and build if necessary). For releases you can omit DEBUG=1
$ sudo scons DEBUG=1 --prefix=/usr install
Done!
You should be now able to see the manpage with rmlint --help or man 1
rmlint.
Uninstall with sudo scons uninstall and clean with scons -c.
You can also only type the install command above. The buildsystem is clever
enough to figure out which targets need to be built beforehand.
Troubleshooting¶
On some distributions (especially Debian derived) rmlint --gui might fail
with /usr/bin/python3: No module named shredder (or similar). This is due
some incompatible changes on Debian’s side.
See this thread for a workaround using PYTHONPATH.
Gentle Guide to rmlint¶
Welcome to the Tutorial of rmlint.

We use a few terms that might not be obvious to you at first, so we gonna explain them to you here.
| Original: | In a group of duplicate files, one file is said to be the original file. It might not, strictly speaking, be the original from which the copies where created, but is a convenient terminology for selecting which files to keep and which to delete. |
|---|---|
| Duplicate: | A file that matches the original. Note that depending on rmlint settings, “match” may mean an exact match or just that the files have matching hash values. |
Beginner Examples¶
Let’s just dive in into some examples:
$ rmlint
This simply scans your current working directory for lint and reports them in
your terminal. Note that nothing will be removed (even if it prints rm).
Despite its name, rmlint just finds suspicious files, but never modifies the
filesystem itself [*]. Instead it gives you detailed reports in different
formats to get rid of them yourself. These reports are called outputs. By
default a shellscript will be written to rmlint.sh that contains readily
prepared shell commands to remove duplicates and other finds,
| [*] | You could say it should be named findlint. |
So for the above example the full process, if you want to actually delete the lint that was found, would be:
$ rmlint some/path
# (wait for rmlint to finish running)
$ gedit rmlint.sh
# (or any editor you prefer... review the content of rmlint.sh to
# check what it plans to delete; make any edits as necessary)
$ ./rmlint.sh
# (the rmlint.sh script will ask for confirmation, then delete the
# appropriate lint, then delete itself)
On larger runs, it might be more preferable to show a progressbar instead of a
long list of files. You can do this easily with the -g switch:
$ rmlint -g
It will look like this:

Filtering input files¶
What if we do not want to check all files as dupes? rmlint has a
good repertoire of options to select only certain files. We won’t cover
all options, but will get you started with a few useful ones. Note if
you want a more do-it-yourself approach to file filtering, you
can also use external tools to feed rmlint's stdin:
$ find pics/ -iname '*.png' | rmlint -
$ find pics/ -iname '*.png' -print0 | rmlint -0 # (also handles filenames with newline characters)
Limit files by size using --size¶
# only check files between 20 MB and 1 Gigabyte:
$ rmlint --size 20M-1G
# short form (-s) works just as well:
$ rmlint -s 20M-1G
# only check files bigger than 4 kB:
$ rmlint -s 4K
# only check files smaller than 1234 bytes:
$ rmlint -s 0-1234
# Find empty files and handle them as duplicates:
$ rmlint -T df --size 0-1
Valid units include:
If no units are given, rmlint will assume bytes.
Limit duplicate matching according to basename¶
By default, rmlint compares file contents, regardless of file name.
So if afile.jpg has the same content as bfile.txt (which is unlikely!),
then rmlint will find and report this as a duplicate.
You can speed things up a little bit by telling rmlint not to try to
match files unless they have the same or similar file names. The three
options here are:
-b (--match-basename)-e (--match-extension)-i (--match-without-extension) .Examples:
# Find all duplicate files with the same basename:
$ rmlint -b some_dir/
ls some_dir/one/hello.c
rm some_dir/two/hello.c
# Find all duplicate files that have the same extension:
$ rmlint -e some_dir/
ls some_dir/hello.c
rm some_dir/hello_copy.c
# Find all duplicate files that have the same basename:
# minus the extension
$ rmlint -i some_dir/
ls some_dir/hello.c
rm some_dir/hello.bak
Limit files by their modification time¶
This is a useful feature if you want to investigate only files newer than
a certain date or if you want to progressively update the results, i.e. when you
run rmlint in a script that watches a directory for duplicates.
The manual way is using -N (--newer-than=<timestamp>):
# Use a Unix-UTC Timestamp (seconds since epoch)
$ rmlint -N 1414755960
# Find all files newer than file.png
$ rmlint -N $(stat --print %Y file.png)
# Alternatively use an ISO8601 formatted Timestamp
$ rmlint -N 2014-09-08T00:12:32+0200
If you are periodically checking the same directory tree for duplicates,
you can get a substantial speedup by creating an automatic timestamp file
each time you run rmlint. To do this, use command line options:
-n (--newer-than-stamp) and
-O stamp:stamp.file (we’ll come to outputs in a minute):
Here’s an example for incrementally scanning your home folder:
# First run of rmlint:
$ rmlint /home/foobar -O stamp:/home/foobar/.rmlint.stamp
ls /home/foobar/a.file
rm /home/foobar/b.file
# Second run, no changes:
$ rmlint /home/foobar -n /home/foobar/.rmlint.stamp
<nothing>
# Second run, new file copied:
$ cp /home/foobar/a.file /home/foobar/c.file
$ rmlint /home/foobar -n /home/foobar/.rmlint.stamp
ls /home/foobar/a.file
rm /home/foobar/b.file
rm /home/foobar/c.file
Note that -n updates the timestamp file each time it is run.
Outputs & Formatters¶
rmlint is capable of creating reports in several output formats, to
either your screen or to a file. If you run it with the default options you
already see two of those output formatters on your screen, namely pretty
and summary.
Extra output formats can be added via either the -O (--add-output)
or -o (--output) switch. The only difference is the -o clears
all the default outputs while -O just adds to the defaults.
Note
If you just came here to learn how to print a nice progressbar:
Just use the -g (--progress) option:
$ rmlint -g /usr
Here’s an example:
$ rmlint -o json:stderr
Here you would get this output printed on stderr:
[{
"description": "rmlint json-dump of lint files",
"cwd": "/home/user/",
"args": "rmlint -o json:stderr"
},
{
"type": "duplicate_file",
"path": "/home/user/test/b/one",
"size": 2,
"inode": 2492950,
"disk_id": 64771,
"progress": 100,
"is_original": true,
"mtime": 1414587002
},
... snip ...
{
"aborted": false,
"total_files": 145,
"ignored_files": 9,
"ignored_folders": 4,
"duplicates": 11,
"duplicate_sets": 2,
"total_lint_size": 38
}]
You probably noticed the colon in the commandline above. Everything before it is
the name of the output-format, everything behind is the path where the output
should land. Instead of a path you can also use stdout and stderr, as
we did above or just omit the colon which will print everything to stdout.
Some formatters can be customised using the -c (--config) command.
Here’s the list of currently available formatters and their config options:
| json: | Outputs all finds as a json document. The document is a list of dictionaries,
where the first and last element is the header and the footer respectively,
everything between are data-dictionaries. This format was chosen to allow
application to parse the output in realtime while The header contains information about the program invocation, while the footer contains statistics about the program-run. Every data element has a type which identifies its lint type (you can lookup all types here_). Config values:
|
|---|---|
| sh: | Outputs a shell script defines a command function for each lint type, which
it then calls for each file of each type. The script can be executed (it is
already It is enabled by default and writes to Example output: $ rmlint -o sh:stdout
#!/bin/sh
# This file was autowritten by rmlint
# rmlint was executed from: /home/user/
# You command line was: ./rmlint -o sh:rmlint.sh
# ... snip ...
echo '/home/user/test/b/one' # original
remove_cmd '/home/user/test/b/file' # duplicate
remove_cmd '/home/user/test/a/two' # duplicate
remove_cmd '/home/user/test/a/file' # duplicate
if [ -z $DO_REMOVE ]
then
rm -f 'rmlint.sh';
fi
Config values:
Example (predefined config): $ rmlint -o sh:stdout -o sh:rmlint.sh -c sh:symlink
...
echo '/home/user/test/b/one' # original
cp_symlink '/home/user/test/b/file' '/home/user/test/b/one' # duplicate
$ ./rmlint.sh -d
Keeping: /home/user/test/b/one
Symlinking to original: /home/user/test/b/file
Example (custom command): The following example uses the trash-put command from the trash-cli utility to move duplicate files to trash: $ rmlint -o sh -c sh:cmd='echo "Trashing $1" && trash-put "$1"'
|
| py: | Outputs a python script and a JSON file. The json file is the same as that produced
by the json formatter. The JSON file is written to Example: $ rmlint -o py:remover.py
$ ./remover.py --dry-run # Needs Python3
Deleting twins of /home/user/sub2/a
Handling (duplicate_file): /home/user/sub1/a
Handling (duplicate_file): /home/user/a
Deleting twins of /home/user/sub2/b
Handling (duplicate_file): /home/user/sub1/b
|
| csv: | Outputs a csv formatted dump of all lint files. Handy for all the spreadsheet-jockeys out there! It looks like this: $ rmlint -o csv -D
type,path,size,checksum
emptydir,"/home/user/tree2/b",0,00000000000000000000000000000000
duplicate_dir,"/home/user/test/b",4,f8772f6fda08bbc826543334663d6f13
duplicate_dir,"/home/user/test/a",4,f8772f6fda08bbc826543334663d6f13
duplicate_dir,"/home/user/tree/b",8,62202a79add28a72209b41b6c8f43400
duplicate_dir,"/home/user/tree/a",8,62202a79add28a72209b41b6c8f43400
duplicate_dir,"/home/user/tree2/a",4,311095bc5669453990cd205b647a1a00
Config values:
|
| stamp: | Outputs a timestamp of the time Config values:
|
| pretty: | Pretty-prints the found files in a colorful output (intended to be printed on stdout or stderr). This is enabled by default. |
| summary: | Sums up the run in a few lines with some statistics. This enabled by default too. |
| progressbar: | Prints a progressbar during the run of Config values:
|
| fdupes: | A formatter that behaves similar to fdupes(1) - another duplicate
finder. This is mostly indented for compatibility (e.g. scripts that relied
on that format). Duplicate set of files are printed as block, each separated
by a newline. Original files are highlighted in green (this is an addition).
During scanning a progressbar and summary are printed, followed by the fdupes
output. The first two are printed to Consider using the far more powerful |
Paranoia mode¶
Let’s face it, why should you trust rmlint?
Technically it only computes a hash of your file which might, by its nature,
collide with the hash of a totally different file. If we assume a perfect hash
function (i.e. one that distributes its hash values perfectly even over all
possible values), the probability of having a hash-collision is
\(\frac{1}{2^{512}}\) for the default blake2b 512-bit hash. Of course hash
functions are not totally random, so the collision probability is slightly higher.
Due to the “birthday paradox”, collision starts to become a real risk if you have
more than about \(2^{256}\) files of the same size.
If you’re wary, you might want to make a bit more paranoid than the default. By
default the blake2b (previously sha1 was the default) hash algorithm is
used, which we consider a good trade-off of speed and accuracy. rmlint’s
paranoia level can be adjusted using the -p (--paranoid) switch.
Here’s what they do in detail:
-pis equivalent to--algorithm=paranoid-Pis equivalent to--algorithm=highway256-PPis equivalent to--algorithm=metro256-PPPis equivalent to--algorithm=metro
As you see, it just enables a certain duplicate detection algorithm to either use a stronger hash function or to do a byte-by-byte comparison. While this might sound slow it’s often only a few seconds slower than the default behaviour.
There is a bunch of other hash functions you can lookup in the manpage. We recommend never to use anything worse than the default.
Note
Even with the default options, the probability of a false positive doesn’t
really start to get significant until you have around 1,000,000,000,000,000,000,000,000
different files all of the same file size. Bugs in rmlint are sadly (or happily?)
more likely than hash collisions.
See http://preshing.com/20110504/hash-collision-probabilities/ for discussion.
Original detection / selection¶
As mentioned before, rmlint divides a group of dupes in one original and
one or more duplicates of that one. While the chosen original might not be the one
that was there first, you generally want to select one file to keep from each
duplicate set.
By default, if you specify multiple paths in the rmlint command, the files in the first-named paths are treated as more “original” than the later named paths. If there are two files in the same path, then the older one will be treated as the original. If they have the same modification time then it’s just a matter of chance which one is selected as the original.
The way rmlint chooses the original can be customised by the -S
(--rank-by) option.
Here’s an example:
# Normal run:
$ rmlint
ls c
rm a
rm b
# Use alphabetically first one as original
$ rmlint -S a
ls a
rm b
rm c
Alphabetically first makes sense in the case of backup files, ie a.txt.bak comes after a.txt.
Here’s a table of letters you can supply to the -S option:
| m | keep lowest mtime (oldest) | M | keep highest mtime (newest) |
| a | keep first alphabetically | A | keep last alphabetically |
| p | keep first named path | P | keep last named path |
| d | keep path with lowest depth | D | keep path with highest depth |
| l | keep path with shortest basename | L | keep path with longest basename |
| r | keep paths matching regex | R | keep path not matching regex |
| x | keep basenames matching regex | X | keep basenames not matching regex |
| h | keep file with lowest hardlink count | H | keep file with highest hardlink count |
| o | keep file with lowest number of hardlinks outside of the paths traversed by rmlint. |
O | keep file with highest number of hardlinks outside of the paths traversed by rmlint. |
The default setting is -S pOma. Multiple sort criteria can be specified,
eg -S mpa will sort first by mtime, then (if tied), based on which path you
specified first in the rmlint command, then finally based on alphabetical order
of file name. Note that “original directory” criteria (see below) take
precedence over any -S options.
Alphabetical sort will only use the basename of the file and ignore its case.
One can have multiple criteria, e.g.: -S am will choose first alphabetically; if tied then by mtime.
Note: original path criteria (specified using //) will always take first priority over -S options.
For more fine grained control, it is possible to give a regular expression
to sort by. This can be useful when you know a common fact that identifies
original paths (like a path component being src or a certain file ending).
To use the regular expression you simply enclose it in the criteria string
by adding <REGULAR_EXPRESSION> after specifying r or x. Example: -S
'r<.*\.bak$>' makes all files that have a .bak suffix original files.
Warning: When using r or x, try to make your regex to be as specific
as possible! Good practice includes adding a $ anchor at the end of the regex.
Tips:
l is useful for files like file.mp3 vs file.1.mp3 or file.mp3.bak.
a can be used as last criteria to assert a defined order.
o/O and h/H are only useful if there any hardlinks in the traversed path.
o/O takes the number of hardlinks outside the traversed paths (and thereby minimizes/maximizes the overall number of hardlinks). h/H in contrast only takes the number of hardlinks inside of the traversed paths. When hardlinking files, one would like to link to the original file with the highest outer link count (O) in order to maximise the space cleanup. H does not maximise the space cleanup, it just selects the file with the highest total hardlink count. You usually want to specify O.
pOma is the default since p ensures that first given paths rank as originals, O ensures that hardlinks are handled well, m ensures that the oldest file is the original and a simply ensures a defined ordering if no other criteria applies.
If you something very specific about the paths you’re searching, then the
r/Rorx/Xoptions are your friend. You can also specify those options multiple times. Have an example here:# Sort paths with ABC in them first, then DEF, then GHI. # Everthing with »temp«, »tmp« or »cache« in it comes last, # the rest is sandwhiched in between and sorted by their modification time (m). # If something is tied, the modification time is also used a sorting criteria. $ rmlint -S 'r<.*ABC.*>r<.*DEF.*>r<.*GHI.*>R<.*(tmp|temp|cache).*>m' /tmp/t # Duplicate(s): ls '/tmp/t/ABC' rm '/tmp/t/DEF' rm '/tmp/t/GHI' rm '/tmp/t/another' rm '/tmp/t/other' rm '/tmp/t/xxx-cache-yyy' rm '/tmp/t/xxx-tmp-yyy' rm '/tmp/t/xxx-tempt-yyy'
For more information you can also follow this link
Flagging original directories¶
Sometimes you have a specific path that only contains originals, or only contains
backups. In this case you can flag directories on the commandline by using
a special separator (//) between the duplicate and original paths. Every path
after the // separator is considered to be “tagged” and will be treated as an
original where possible. Tagging always takes precedence over the -S options above.
$ rmlint a // b
ls b/file
rm a/file
If there are more than one tagged files in a duplicate group then the highest
ranked (per -S options) will be kept. In order to never delete any tagged files,
there is the -k (--keep-all-tagged) option. A slightly more esoteric option
is -m (--must-match-tagged), which only looks for duplicates where there is
an original in a tagged path.
Here’s a real world example using these features: You have a portable backup drive with some old backups on it. You have just backed up your home folder to a new backup drive. You want to reformat the old backup drive and use it for something else. But first you want to check that there is nothing on the old drive that you don’t have somewhere else. The old drive is mounted at /media/portable.
# Find all files on /media/portable that can be safely deleted:
$ rmlint --keep-all-tagged --must-match-tagged /media/portable // ~
# check the shellscript looks ok:
$ less ./rmlint.sh # or use gedit or any other viewer/editor
# run the shellscript to delete the redundant backups
$ ./rmlint.sh
# run again (to delete empty dirs)
$ rmlint -km /media/portable // ~
$ ./rmlint.sh
# see what files are left:
$ tree /media/portable
# recover any files that you want to save, then you can safely reformat the drive
In the case of nested mountpoints, it may sometimes makes sense to use the
opposite variations, -K (--keep-all-untagged) and -M (--must-match-untagged).
Finding duplicate directories¶
Note
--merge-directories is still an experimental option that is non-trivial
to implement. Please double check the output and report any possible bugs.
As far as we know, rmlint is the only duplicate finder that can do this.
Basically, all you have to do is to specify the -D (--merge-directories)
option and rmlint will cache all duplicates until everything is found and
then merge them into full duplicate directories (if any). All other files are
printed normally.
This may sound simple after all, but there are some caveats you should know of.
Let’s create a tricky folder structure to demonstrate the feature:
$ mkdir -p fake/one/two/ fake/one/two_copy fake/one_copy/two fake/one_copy/two_copy
$ echo xxx > fake/one/two/file
$ echo xxx > fake/one/two_copy/file
$ echo xxx > fake/one_copy/two/file
$ echo xxx > fake/one_copy/two_copy/file
$ echo xxx > fake/file
$ echo xxx > fake/another_file
Now go run rmlint on it like that:
$ rmlint fake -D -S a
# Duplicate Directorie(s):
ls -la /home/sahib/rmlint/fake/one
rm -rf /home/sahib/rmlint/fake/one_copy
ls -la /home/sahib/rmlint/fake/one/two
rm -rf /home/sahib/rmlint/fake/one/two_copy
# Duplicate(s):
ls /home/sahib/rmlint/fake/another_file
rm /home/sahib/rmlint/fake/one/two/file
rm /home/sahib/rmlint/fake/file
==> In total 6 files, whereof 5 are duplicates in 1 groups.
==> This equals 20 B of duplicates which could be removed.
As you can see it correctly recognized the copies as duplicate directories.
Also, it did not stop at fake/one but also looked at what parts of this
original directory could be possibly removed too.
Files that could not be merged into directories are printed separately. Note
here, that the original is taken from a directory that was preserved. So exactly
one copy of the xxx-content file stays on the filesystem in the end.
rmlint finds duplicate directories by counting all files in the directory
tree and looking up if there’s an equal amount of duplicate and empty files. If
yes, it checks if the hashes are equal using a Merkle Tree. If it matches, it
continues on the parent directory.
Some file like hidden files will not be recognized as duplicates, but still
added to the count. This will of course lead to unmerged directories. That’s why
the -D option implies the -r (--hidden) and -l
(--hardlinked) option in order to make this convenient.
A note to symbolic links: The default behaviour with –merge-directories is to
not follow symbolic links, but to compare the link targets. If the target is the
same, the link will be the same. This is a sane default for duplicate directories,
since twin copies often are created by doing a backup of some files. In this case
any symlinks in the backed-up data will still point to the same target. If you
have symlinks that reference a file in each respective directory tree, consider
using -f.
Warning
Do never ever modify the filesystem (especially deleting files) while
running with the -D option. This can lead to mismatches in the file
count of a directory, possibly causing dataloss. You have been
warned!
Sometimes it might be nice to only search for duplicate directories, banning all the sole files from littering the screen. While this will not delete all files, it will give you a nice overview of what you copied where.
Since duplicate directories are just a lint type as every other, you can just
pass it to -T: -T "none +dd" (or -T "none +duplicatedirs").
There’s also a preset of it to save you some typing: -T minimaldirs.
Warning
Also take note that -D will cause a higher memory footprint and might
add a bit of processing time. This is due to the fact that all files need to
be cached till the end and some other internal data structures need to be
created.
Replaying results¶
Often it is useful to just re-output the results you got from rmlint.
That’s kind of annoying for large datasets, especially when you have big files.
For this, rmlint features a special mode, where it re-outputs the result of
previous runs. By default, rmlint will spit out a .json file (ususally
called rmlint.json). When --replay is given, you can pass one or more
of those .json files to the commandline as they would be normal
directories. rmlint will then merge and re-output then. Note however, that
no filesystem input/output is done.
The usage of the --replay feature is best understood by example:
$ rmlint real-large-dir --progress
# ... lots of output ...
$ cp rmlint.json large.json # Save json, so we don't overwrite it.
$ rmlint --replay large.json real-large-dir
# ... same output, just faster ...
$ rmlint --replay large.json --size 2M-512M --sort-by sn real-large-dir
# ... filter stuff; and rank by size and by size and groupsize ....
$ rmlint --replay large.json real-large-dir/subdir
# ... only show stuff in /subdir ...
Warning
Details may differ
The generated output might differ slightly in order and details. For example the total number of files in the replayed runs will be the total of entries in the json document, not the total number of traversed files.
Also be careful when replaying on a modified filesystem. rmlint will
ignore files with newer mtime than in the .json file for safety reason.
Warning
Not all options might work
Options that are related to traversing and hashing/reading have no effect. Those are:
- –followlinks
- –algorithm and –paranoid
- –clamp-low
- –hardlinked
- –write-unfinished
- all other caching options.
Miscellaneous options¶
If you read so far, you know rmlint pretty well by now.
Here’s just a list of options that are nice to know, but are not essential:
Consecutive runs of
rmlintcan be speed up by using--xattr.$ rmlint large_dataset/ --xattr $ rmlint large_dataset/ --xattr
Here, the second run should (or might) run a lot faster, since the first run saved all calculated checksums to the extended attributes of each processed file. But be sure to read the caveats stated in the manpage! Especially keep in mind that you need to have write access to the files for this to work.
-r(--hidden): Include hidden files and directories. The default is to ignore these, to save you from destroying git repositories (or similar programs) that save their information in a.gitdirectory wherermlintoften finds duplicates.If you want to be safe you can do something like this:
$ # find all files except everything under .git or .svn folders $ find . -type d | grep -v '\(.git\|.svn\)' -print0 | rmlint -0 --hidden
But you would have checked the output anyways, wouldn’t you?
If something ever goes wrong, it might help to increase the verbosity with
-v(up to-vvv).Usually the commandline output is colored, but you can disable it explicitly with
-w(--with-color). If stdout or stderr is not a terminal anyways,rmlintwill disable colors itself.You can limit the traversal depth with
-d(--max-depth):$ rmlint -d 0 <finds everything in the same working directory>
If you want to prevent
rmlintfrom crossing mountpoints (e.g. scan a home directory, but no the HD mounted in there), you can use the-x(--no-crossdev) option.It is possible to tell
rmlintthat it should not scan the whole file. With-q(--clamp-low) /-Q(--clamp-top) it is possible to limit the range to a starting point (-q) and end point (-Q). The point where to start might be either given as percent value, factor (percent / 100) or as an absolute offset.If the file size is lower than the absolute offset, the file is simply ignored.
This feature might prove useful if you want to examine files with a constant header. The constant header might be different, i.e. by a different ID, but the content might be still the same. In any case it is advisable to use this option with care.
Example:
# Start hashing at byte 100, but not more than 90% of the filesize. $ rmlint -q 100 -Q .9
Scripting¶
Sometimes rmlint can’t help you with everything. While we get a lot of
feature request to have some more comfort-options built-in, we have to decline
most of them to make sure that rmlint does not become too bloated. But fret not,
we have lots of possibilities to do some scripting. Let’s look at some common problem
that can be easily solved with some other tools.
Copying unique files¶
Imagine you have a folder from which you want to extract one copy of each file
by content. This does not only mean unique files, but also original files - but
not their duplicates. This sounds like a job for the uniques formatter
(which outputs all unique paths, one by line) and jq. jq is a great
little tool which makes it really easy to extract data from a json file:
# This command produces two files:
# - unique_files: Files that have a unique checksum in the directory.
# - original_files: Files that have the "is_original" field set to true in the json output.
# The '.[1:-1]' part is for filtering the header and footer part of the json response.
$ rmlint t -o json -o uniques:unique_files | jq -r '.[1:-1][] | select(.is_original) | .path' | sort > original_files
# Now we only need to combine both files:
$ cat unique_files original_files
Filter by regular expressions¶
A very often requested feature is to provide something like --include or
--exclude where you could pass a regular expression to include or exclude
some files from traversing. But rmlint is not a clone of find. Instead
you can use find just fine to pipe output into rmlint:
# Deduplicate all png pictures that were not modified in the last 24 hours:
$ find ~ -iname '*.png' ! -mtime 0 | rmlint -
Graphical user interface¶
As of rmlint \(\geq 2.4.0\) a GUI frontend called Shredder is
shipped alongside of rmlint. It is written in Python and uses no external
dependencies beside gtk+ \(\geq 3.14\) and PyGObject.
Warning
The user interface is still in development. Use at your own risk! There is a safety net though: Every file will be re-checked before its deletion.
Installation¶
If you compiled rmlint from source, scons will try to build and install
the GUI, except you pass --without-gui to it.
Usage¶
The GUI can be started via rmlint --gui.The application is divided into several
views that guide you through the duplicate finding process.
Developers¶
Location view¶

Shows a list of locations the user might want to scan. A number of locations is guessed from the list of mounted volumes, recently used files and a static set of paths. The user can of course add a new location via a filebrowser.
The user can select one or multiple paths and hit Scan. In prior he might choose to prefer certain paths, so only files in non-preferred paths are deleted if they have a twin in a preferred path.
Runner view¶

After hitting scan in the locations view, the application will start rmlint
in the background. The output will be shown live in the treeview on the left.
Once finished, a chart will be shown on the right that shows how the duplicates
are distributed over the scanned directories. The treeview will show the
detailed list of found files. A red cross will indicate that Shredder wants
to delete this file, a green checkmark will make it keep it.
The user can edit those to his liking.
Additionally, the view can be filtered after a search query. In the simplest
case this filters by a path element, in more complex use cases you can also
filter by size, mtime and twincount. The latter can be done by adding
size:10K or size:1M-2M,3M-4M to the query (similar with mtime: and
count:)
Once happy with the results, the user can generate a script out of the results (all or just those that are visible).
Editor view¶

A source editor will show the generated script. It can be edited and searched
through. Apart from that, the file can be saved not only a .sh file, but
also as .csv and .json file.
The user can now choose to save the script and execute it himself, or
to click the Run Script button. If this button is blue, it indicates a dry
run, where nothing will be deleted. A red button however will kill your files.
In any way, a running counter of deleted bytes will be shown.
Settings view¶

The settings view is the leftmost view and will not be shown by default in the process. It can always be accessed by:
- Going to the leftmost view.
- Hitting the
Settingsmenu entry. - Hit the gear button in the runner view.
Normal user probably do not need to adjust anything.
The options shown here, resemble the option that may be given to
the commandline of rmlint.
Design¶
The design loosely follows the Gnome Human Interface Guidelines. [*] Beside the appearance, this means that the program should be easy and intuitive to use. Suggested actions should be clear to recognize and the application should always be responsive and never just do work in the background.
| [*] | https://developer.gnome.org/hig/stable/ |
Internal¶
Shredder works by forking off rmlint and reading its json output in
parallel. The script generation works by calling rmlint --replay on the
generated json file, since this is the only sane way to filter the results
of all formats properly.
Cautions (or why it’s hard to write a dupefinder)¶
This section covers good practice for safe duplicate removal. It is not intended to
be specifically related to rmlint. It includes general discussion on duplicate
detection and shows, by example, some of the traps that duplicate finders can fall into.
This section might not only be useful for developers of dupe finders, but also
educational for users that strive for best practices regarding deduplication.
Good Practice when Deleting Duplicates¶
Backup your data¶
There is a wise adage, “if it’s not backed up, it’s not important”. It’s just good practice to keep your important data backed up. In particular, any time you are contemplating doing major file reorganisations or deletions, that’s a good time to make sure that your backups are up to date.
What about when you want to clean up your backups by deleting duplicate files from your backup drive? Well as long as your duplicate file finder is reliable, you shouldn’t have any problems. Consider replacing the duplicate with a link (hardlink, symlink or reflink) to the original data. This still frees up the space, but makes it easier to find the file if and when it comes time to restore files from backup.
Measure twice, cut once¶
This is a popular saying amongst builders; the same goes for your files. Do at least some
sort of sanity check on which files are going to be deleted. All duplicate file finders
(including rmlint) are capable of identifying false positives or more serious bugs.
Beware of unusual filename characters¶
Even a space in a filename is capable of causing grief. Make sure your file deletion command (or the one used by your duplicate finder) has the filename properly escaped.
Consider safe removal options¶
Rather than deleting duplicates, consider moving them to a holding area or trash
folder. The trash-cli utility is one option for this. Alternatively if
using the rmlint shell script you can replace the remove_cmd section as
follows to move the files to /tmp:
remove_cmd() {
echo 'Deleting:' "$1"
if original_check "$1" "$2"; then
if [ -z "$DO_DRY_RUN" ]; then
# was: rm -rf "$1"
mv -p "$1" "/tmp$1"
fi
fi
}
Another safe alternative, if your files are on a copy-on-write filesystem such
as btrfs, and you have linux kernel 4.2 or higher, is to use a deduplication
utility such as duperemove or rmlint --dedupe:
$ duperemove -dh original duplicate
$ rmlint --dedupe original duplicate
Both of the above first verify (via the kernel) that original and
duplicate are identical, then modifies duplicate to reference
original’s data extents. Note they do not change the mtime or other
metadata of the duplicate (unlike hardlinks).
If you pass -c sh:link to rmlint, it will even check for you if your
filesystem is capable of reflinks and emit the correct command conveniently.
You might think hardlinking as a safe alternative to deletion, but in fact hardlinking first deletes the duplicate and then creates a hardlink to the original in its place. If your duplicate finder has found a false positive, it is possible that you may lose your data.
Attributes of a Robust Duplicate Finder¶
(also known as “Traps for young dupe finders”)
Traversal Robustness¶
Path Doubles
One simple trap for a dupe finder is to not realise that it has reached the same file via two different paths. This can happen due to user inputting overlapping paths to traverse, or due to symlinks or other filesystem loops such as bind mounts. Here’s a simple “path double” example trying to trick a duplicate file finder by “accidentally” feeding it the same path twice. We’ll use fdupes for this example:
$ mkdir dir
$ echo "important" > dir/file
$ fdupes -r --delete --noprompt dir dir
[no output]
$ ls dir
file
So far so good, fdupes didn’t fall for the trick. It has a check built-in which looks at
the files’ device and inode numbers, which automatically filters out path doubles.
Let’s try again using the -H option to find hardlinked duplicates:
$ fdupes -r -H --delete --noprompt dir dir
[+] dir/file
[-] dir/file
$ ls -l dir/
total 0
Oh dear, our file is gone! The problem is that hardlinks share the same device and inode numbers, so the inode check is turned off for this option.
Dupe finders rdfind and dupd can also be tricked with the right combination of settings:
$ rdfind -removeidentinode false -deleteduplicates true a a
[snip]
Now deleting duplicates:
Deleted 1 files.
$ ls -l dir/
total 0
$ dupd scan --path /home/foo/a --path /home/foo/a
Files scanned: 2
Total duplicates: 2
Run 'dupd report' to list duplicates.
$ dupd report
Duplicate report from database /home/foo/.dupd_sqlite:
20 total bytes used by duplicates:
/home/foo/a/data
/home/foo/a/data
Solution:
For a duplicate finder to be able to find hardlinked duplicates, without also inadvertently identifying a file as a duplicate or itself, a more sophisticated test is required. Path doubles will always have:
- matching device and inode.
- matching basename.
- parent directories also have matching device and inode.
That seems pretty fool-proof (see rmlint example below) but please file an issue
on our Issue Tracker if you find an exception.
$ echo "data" > dir/file
$ # rmlint with default settings:
$ rmlint dir dir
==> In total 2 files, whereof 0 are duplicates in 0 groups.
==> This equals 0 B of duplicates which could be removed.
$
$ # rmlint with hardlink duplicate detection enabled:
$ rmlint --hardlinked dir dir
==> In total 2 files, whereof 0 are duplicates in 0 groups.
==> This equals 0 B of duplicates which could be removed.
$ ls dir
file
Symlinks:
“Ah but I’m not silly enough to enter the same path twice” you say. Well maybe so, but there are other ways that folder traversal can reach the same path twice, for example via symbolic links:
$ mkdir dir
$ echo "important" > dir/file
$ ln -s dir link
$ fdupes -r --delete --noprompt .
$ ls -l dir/
total 0
Symlinks can make a real mess out of filesystem traversal:
$ mkdir dir
$ cd dir
$ ln -s . link
$ cd ..
$ echo "data" > dir/file
$ fdupes -rHs dir
dir/file
dir/link/file
dir/link/link/file
[snip]
dir/link/link/link/link/link/link/link/link/link/link/link/link/link/link/link/link/link/link/link/link/link/link/link/link/link/link/link/link/link/link/link/link/link/link/link/link/link/link/link/link/file
Set 1 of 1, preserve files [1 - 41, all]:
Solution:
During traversal, the duplicate finder should keep track of all folders visited (by device and inode number). Don’t re-traverse folders that were already traversed.
Hardlinks:
Also as noted above, replacing duplicates with hardlinks can still end badly if there are
false positives. For example, using rdfind’s the -makehardlinks option:
$ echo "data" > dir/file
$ rdfind -removeidentinode false -makehardlinks true dir dir
[snip]
It seems like you have 2 files that are not unique
Totally, 5 b can be reduced.
Now making results file results.txt
Now making hard links.
failed to make hardlink dir/file to dir/file
$ ls -l dir
total 0
Solution:
Don’t find false positives. Check files are on same filesystem before trying to create hardlink. Temporarily rename the duplicate before creating the hardlink and then deleting the renamed file.
Collision Robustness¶
Duplicate detection by file hash
If a duplicate finder uses file hashes to identify duplicates, there is a very small risk that two different files have the same hash value. This is called a hash collision and can result in the two files being falsely flagged as duplicates.
Several duplicate finders use the popular MD5 Hash, which is 128 bits
long. With a 128-bit hash, if you have a million sets of same-size files, each set containing
a million different files, the chance of a hash collision is about
0.000 000 000 000 000 000 147%. To get a 0.1% chance of a hash collision you would
need nine hundred thousand million (\(9\times10^{11}\)) groups of (\(9\times10^{11}\)) files each, or one group
of eight hundred thousand million million (\(8\times10^{17}\)) files.
If someone had access to your files, and wanted to create a malicious duplicate, they could potentially do something like this (based on http://web.archive.org/web/20071226014140/http://www.cits.rub.de/MD5Collisions/):
$ mkdir test && cd test
$ # get two different files with same md5 hash:
$ wget http://web.archive.org/web/20071226014140/http://www.cits.rub.de/imperia/md/content/magnus/order.ps
$ wget http://web.archive.org/web/20071226014140/http://www.cits.rub.de/imperia/md/content/magnus/letter_of_rec.ps
$ md5sum * # verify that they have the same md5sum
a25f7f0b29ee0b3968c860738533a4b9 letter_of_rec.ps
a25f7f0b29ee0b3968c860738533a4b9 order.ps
$ sha1sum * # verify that they are not actually the same
07835fdd04c9afd283046bd30a362a6516b7e216 letter_of_rec.ps
3548db4d0af8fd2f1dbe02288575e8f9f539bfa6 order.ps
$ rmlint -a md5 . -o pretty # run rmlint using md5 hash for duplicate file detection
# Duplicate(s):
ls '/home/foo/test/order.ps'
rm '/home/foo/test/letter_of_rec.ps'
$ rmlint test -a sha1 -o summary # run using sha1 hash
==> In total 2 files, whereof 0 are duplicates in 0 groups.
If your intention was to free up space by hardlinking the duplicate to the original, you would end up with two
hardlinked files, one called order.ps and the other called
letter_of_rec.ps, both containing the contents of order.ps.
Solution:
fdupes detects duplicates using MD5 Hashes, but eliminates the collision
risk by doing a byte-wise comparison of the duplicates detected. This means
each file is read twice, which can tend to slow things down.
dupd uses direct file comparison, unless there are more than 3 files in a set of duplicates, in which
case it uses MD5 only.
If you use rmlint’s sha1 hash features, which features 160 bit output,
you need at least \(5.4\times10^{22}\) files before you get a \(0.1\%\)
probability of collision. rmlint’s -p option uses SHA512
(\(5.2\times10^{75}\) files for \(0.1\%\) risk), while rmlint’s
-pp option uses direct file comparison to eliminate the risk altogether.
Refer to the Benchmarks chapter for speed and memory overhead
implications.
Unusual Characters Robustness¶
Spaces, commas, nonprinting characters etc can all potentially trip up a duplicate finder or the subsequent file deletion command. For example:
$ mkdir test
$ echo "data" > 'test/\t\r\"\b\f\\,.'
$ cp test/\\t\\r\\\"\\b\\f\\\\\,. test/copy # even just copying filenames like this is ugly!
$ ls -1 test/
copy
\t\r\"\b\f\\,.
$ md5sum test/* # md5's output gets a little bit mangled by the odd characters
6137cde4893c59f76f005a8123d8e8e6 test/copy
\6137cde4893c59f76f005a8123d8e8e6 test/\\t\\r\\"\\b\\f\\\\,.
$ dupd scan --path /home/foo/test
SKIP (comma) [/home/foo/test/\t\r\"\b\f\\,.]
Files scanned: 1
Total duplicates: 0
Solution: Be careful!
“Seek Thrash” Robustness¶
Duplicate finders use a range of strategies to find duplicates. It is common to reading and compare small increments of potential duplicates. This avoids the need to read the whole file if the files differ in the first few megabytes, so this can give a major speedup in some cases. However, in the case of hard disk drives, constantly reading small increments from several files at the same time causes the hard drive head to have to jump around (“seek thrash”).
Here are some speed test results showing relative speed for scanning my /usr folder (on SSD) and an HDD copy of same.
The speed ratio gives an indication of how effectively the search algorithm manages disk seek overheads:
| Program | /usr (SSD) |
/mnt/usr (HDD) |
Ratio |
|---|---|---|---|
dupd |
48s | 1769s | 36.9 |
fdupes |
65s | 486s | 7.5 |
rmlint |
38s | 106s | 2.8 |
rmlint -pp |
40s | 139s | 3.5 |
Note
Before each run, disk caches were cleared:
$ sync && echo 3 | sudo tee /proc/sys/vm/drop_caches
Solution:
Achieving good speeds on HDD’s requires a balance between small file increments early on, then switching to bigger file increments. Fiemap information (physical location of files on the disk) can be used to sort the files into an order that reduces disk seek times.
Memory Usage Robustness¶
When scanning very large filesystems, duplicate finders may have to hold a large amount of information in
memory at the same time. Once this information exceeds the computers’ RAM, performance will suffer
significantly. dupd handles this quite nicely by storing a lot of the data in a sqlite database file,
although this may have a slight performance penalty due to disk read/write time to the database file.
rmlint uses a path tree structure to reduce the memory required to store all traversed paths.
Frequently Asked Questions¶
rmlint finds more/less dupes than tool X!¶
Make sure that none of the following applies to you:
Both tools might investigate a different number of files. rmlint e.g. does not
look through hidden files by default, while other tools might follow symlinks
by default. Suspicious options you should look into are:
--hidden: Disabled by default, since it might screw up.git/and similar directories.--hardlinked: Might find larger amount files, but not more lint itself.--followlinks: Might leadrmlintto different places on the filesystem.--merge-directories: pulls in both--hiddenand--hardlinked.
If there’s still a difference, check with another algorithm. In particular use
-pp to enable paranoid mode. Also make sure to have -D
(--merge-directories) disabled to see the raw number of duplicate files.
Still here? Maybe talk to us on the issue tracker.
Can you implement feature X?¶
Depends. Go to to the issue tracker and open a feature request.
Here is a list of features where you probably have no chance:
- Port it to Windows.
- Find similar files like
ssdeepdoes.
I forgot to add some options before running on a large dataset. Do I need to re-run it?¶
Probably not. Since rmlint 2.3.0 there is --replay which can be used to
to re-output a json file of a prior run.
If you have changed the filesystem that might not be a good idea of course. In this case you’ll have to re-run, but it’s not as bad as it sounds though. Your filesystem is probably very good at caching.
If you only want to see the difference to what changed since last time you can
look into -n --newer-than-stamp / -N --newer-than.
In some cases you might really need to re-run, but if that happens often, you
might look into --xattr-write and --xattr-read which is capable
of writing finished checksums to extended attributes of each processed file.
I have a very large number of files and I run out of memory and patience.¶
As a rule of thumb, rmlint will allocate ~150 bytes for every file it will
investigate. Additionally paths are stored in a patricia trie, which will
compress paths and save memory therefore.
The memory peak is usually shortly after it finished traversing all files. For example, 5 million files will result in a memory footprint of roughly 1.0GB of memory in average.
Some things to consider:
- Enable the progress bar with
-gto keep track of how much data is left to scan.
Also:
rmlint have been successfully used on datasets of 5 million files. See this
bug report for more information: #109.
If you have usage questions or find weird behaviour, you can also try to reach
us via IRC in #rmlint on irc.freenode.net.
Since version 2.4.0 we also feature an optional graphical user interface:
Informative reference¶
These chapters are informative and are not essential for the average
user. People that want to extend rmlint might want to read this though:
Developer’s Guide¶
This guide is targeted to people that want to write new features or fix bugs in rmlint.
Philosophy¶
We try to adhere to some principles when adding features:
- Try to stay compatible to standard unix’ tools and ideas.
- Try to stay out of the users way and never be interactive.
- Try to make scripting as easy as possible.
- Never make
rmlintmodify the filesystem itself, only produce output to let the user easily do it.
Also keep this in mind, if you want to make a feature request.
Making contributions¶
The code is hosted on GitHub, therefore our preferred way of receiving patches is using GitHub’s pull requests (normal git pull requests are okay too of course).
Note
origin/master should always contain working software. Base your patches
and pull requests always on origin/develop.
Here’s a short step-by-step:
- Fork it.
- Create a branch from develop. (
git checkout develop && git checkout -b my_feature) - Commit your changes. (
git commit -am "Fixed it all.") - Check if your commit message is good. (If not:
git commit --amend) - Push to the branch (
git push origin my_feature) - Open a Pull Request against the develop branch.
- Enjoy a refreshing Tea and wait until we get back to you.
Here are some other things to check before submitting your contribution:
Does your code look alien to the other code? Is the style the same? You can run this command to make sure it is the same:
$ clang-format -style=file -i $(find lib src -iname '*.[ch]')
Do all tests run? Go to the test documentation for more info. Also after opening the pull request, your code will be checked via TravisCI.
Is your commit message descriptive? whatthecommit.com has some good examples how they should not look like.
Is
rmlintrunning okay inside ofvalgrind(i.e. no leaks and no memory violations)?
For language-translations/updates it is also okay to send the .po files via
mail at sahib@online.de, since not every translator is necessarily a
software developer.
Testsuite¶
rmlint has a not yet complete but quite powerful testsuite. It is not
complete yet (and probably never will), but it’s already a valuable boost of
confidence in rmlint's correctness.
The tests are based on nosetest and are written in python>=3.0.
Every testcase just runs the (previously built) rmlint binary a
and parses its json output. So they are technically blackbox-tests.
On every commit, those tests are additionally run on TravisCI.
Control Variables¶
The behaviour of the testsuite can be controlled by certain environment variables which are:
RM_TS_DIR: Testdir to create files in. Can be very large with some tests, sometimestmpfsmight therefore slow down your computer. By default/tmpwill be used.RM_TS_USE_VALGRIND: Run each test inside of valgrind’s memcheck. (slow)RM_TS_CHECK_LEAKS: Fail test if valgrind indicates (definite) memory leak.RM_TS_USE_GDB: Run tests inside ofgdb. Fatal signals will trigger a backtrace.RM_TS_PEDANTIC: Run each test several times with different optimization options and check for errors between the runs. (slow).RM_TS_SLEEP: Waits a long time before executing a command. Useful for starting the testcase and manually running rmlint on the priorly generated testdir.RM_TS_PRINT_CMD: Print the command that is currently run.RM_TS_KEEP_TESTDIR: If a test failed, keep the test files.
Additionally slow tests can be omitted with by appending -a '!slow' to
the commandline. More information on this syntax can be found on the nosetest
documentation.
Before each release we call the testsuite (at least) like this:
$ sudo RM_TS_USE_VALGRIND=1 RM_TS_PRINT_CMD=1 RM_TS_PEDANTIC=1 nosetests-3.4 -s -a '!slow !known_issue'
The sudo here is there for executing some tests that need root access (like
the creating of bad user and group ids). Most tests will work without.
Coverage¶
To see which functions need more testcases we use gcov to detect which lines
were executed (and how often) by the testsuite. Here’s a short quickstart using
lcov:
$ CFLAGS="-fprofile-arcs -ftest-coverage" LDFLAGS="-fprofile-arcs -ftest-coverage" scons -j4 DEBUG=1
$ sudo RM_TS_USE_VALGRIND=1 RM_TS_PRINT_CMD=1 RM_TS_PEDANTIC=1 nosetests-3.4 -s -a '!slow !known_issue'
$ lcov --capture --directory . --output-file coverage.info
$ genhtml coverage.info --output-directory out
The coverage results are updated from time to time here:
Structure¶
tests
├── test_formatters # Tests for output formatters (like sh or json)
├── test_options # Tests for normal options like --merge-directories etc.
├── test_types # Tests for all lint types rmlint can find
└── utils.py # Common utilities shared among tests.
Templates¶
A template for a testcase looks like this:
from nose import with_setup
from tests.utils import *
@with_setup(usual_setup_func, usual_teardown_func)
def test_basic():
create_file('xxx', 'a')
create_file('xxx', 'b')
head, *data, footer = run_rmlint('-a city -S a')
assert footer['duplicate_sets'] == 1
assert footer['total_lint_size'] == 3
assert footer['total_files'] == 2
assert footer['duplicates'] == 1
Rules¶
Test should be able to run as normal user.
If that’s not possible, check at the beginning of the testcase with this:
if not runs_as_root(): return
Regressions in
rmlintshould get their own testcase so they do not appear again.Slow tests can be marked with a slow attribute:
from nose.plugins.attrib import attr @attr('slow') @with_setup(usual_setup_func, usual_teardown_func) def test_debian_support(): assert random.choice([True, False]):
Unresolved issues can be marked with known_issue attribute to avoid failing automated travis testing
Buildsystem Helpers¶
Environment Variables¶
| CFLAGS: | Extra flags passed to the compiler. |
|---|---|
| LDFLAGS: | Extra flags passed to the linker. |
| CC: | Which compiler to use? |
# Use clang and enable profiling, verbose build and enable debugging
CC=clang CFLAGS='-pg' LDFLAGS='-pg' scons VERBOSE=1 DEBUG=1
Variables¶
| O=<level>: | Set the optimization level. Valid levels are currently those that may be passed with the GCC/Clang
option In addition, the level may be |
|---|---|
| DEBUG=1: | Enable a debugging build. This turns on extra tests; in particular, it turns on run-time
assertions. By default, a debug build excludes optimizations that may
hinder debugging, but this may be overridden with the Note that setting This should always be enabled during development. |
| SYMBOLS=1: | Enable debugger symbols. This option instructs the compiler to collect information that will
help tools such as |
| GDB=1: | Enable options that help a debugger (such as This option is equivalent to |
| VERBOSE=1: | Print the exact compiler and linker commands. Useful for troubleshooting build errors. |
| CCFLAGS=<command line options>: | |
Set the last compiler options. Internally, the build system maintains in This command-line variable makes it possible to override an option in
this list by supplying customized command-line options to be appended.
For example: The string that is supplied as the value for this variable is parsed as per a POSIX shell command line, and so it may include shell quoting if necessary. |
|
Arguments¶
| –prefix: | Change the installation prefix. By default this is /usr, but some users
might prefer /usr/local or /opt. |
|---|---|
| –actual-prefix: | This is mainly useful for packagers. The rmlint binary knows where it
is installed (which is needed to set e.g. the path to the gettext files).
When installing a package, most of the time the build is installed to
a local test environment first before being packed to /usr. In this
case the --prefix would be set to the path of the temporary build env,
while --actual-prefix would be set to /usr. |
| –libdir: | Some distributions like Fedora use separate libdirectories for 64/32 bit.
If this happens, you should set the correct one for 64 bit with
--libdir=lib64. |
| –without-libelf: | |
Do not link with libelf, which is needed for nonstripped binary
detection. |
|
| –without-blkid: | Do not link with libblkid, which is needed to differentiate between
normal rotational harddisks and non-rotational disks. |
| –without-json-glib: | |
Do not link with libjson-glib, which is needed to load json-cache files.
Without this library a warning is printed when using --replay. |
|
| –without-fiemap: | |
Do not attempt to use the FIEMAP ioctl(2). |
|
| –without-gettext: | |
Do not link with libintl and do not compile any message catalogs. |
|
All --without-* options come with a --with-* option that inverses its
effect. By default rmlint is built with all features available on the
system, so you do not need to specify any --with-* option normally.
Notable targets¶
| install: | Install all program parts system-wide. |
|---|---|
| config: | Print a summary of all features that will be compiled and what the environment looks like. |
| man: | Build the manpage. |
| docs: | Build the online html docs (which you are reading now). |
| test: | Build the tests (requires $ USE_VALGRIND=1 nosetests # or nosetests-3.3, python3 needed.
|
| xgettext: | Extract a gettext |
| dist: | Build a tarball suitable for release. Save it under
|
| release: | Same as |
Sourcecode layout¶
- All C-source lives in
lib, the file names should be self explanatory. - As an exception, the main lives in
src/rmlint.c. - All documentation is inside
docs. - All translation stuff should go to
po. - All packaging should be done in
pkg/<distribution>. - Tests are written in Python and live in
tests.
Hashfunctions¶
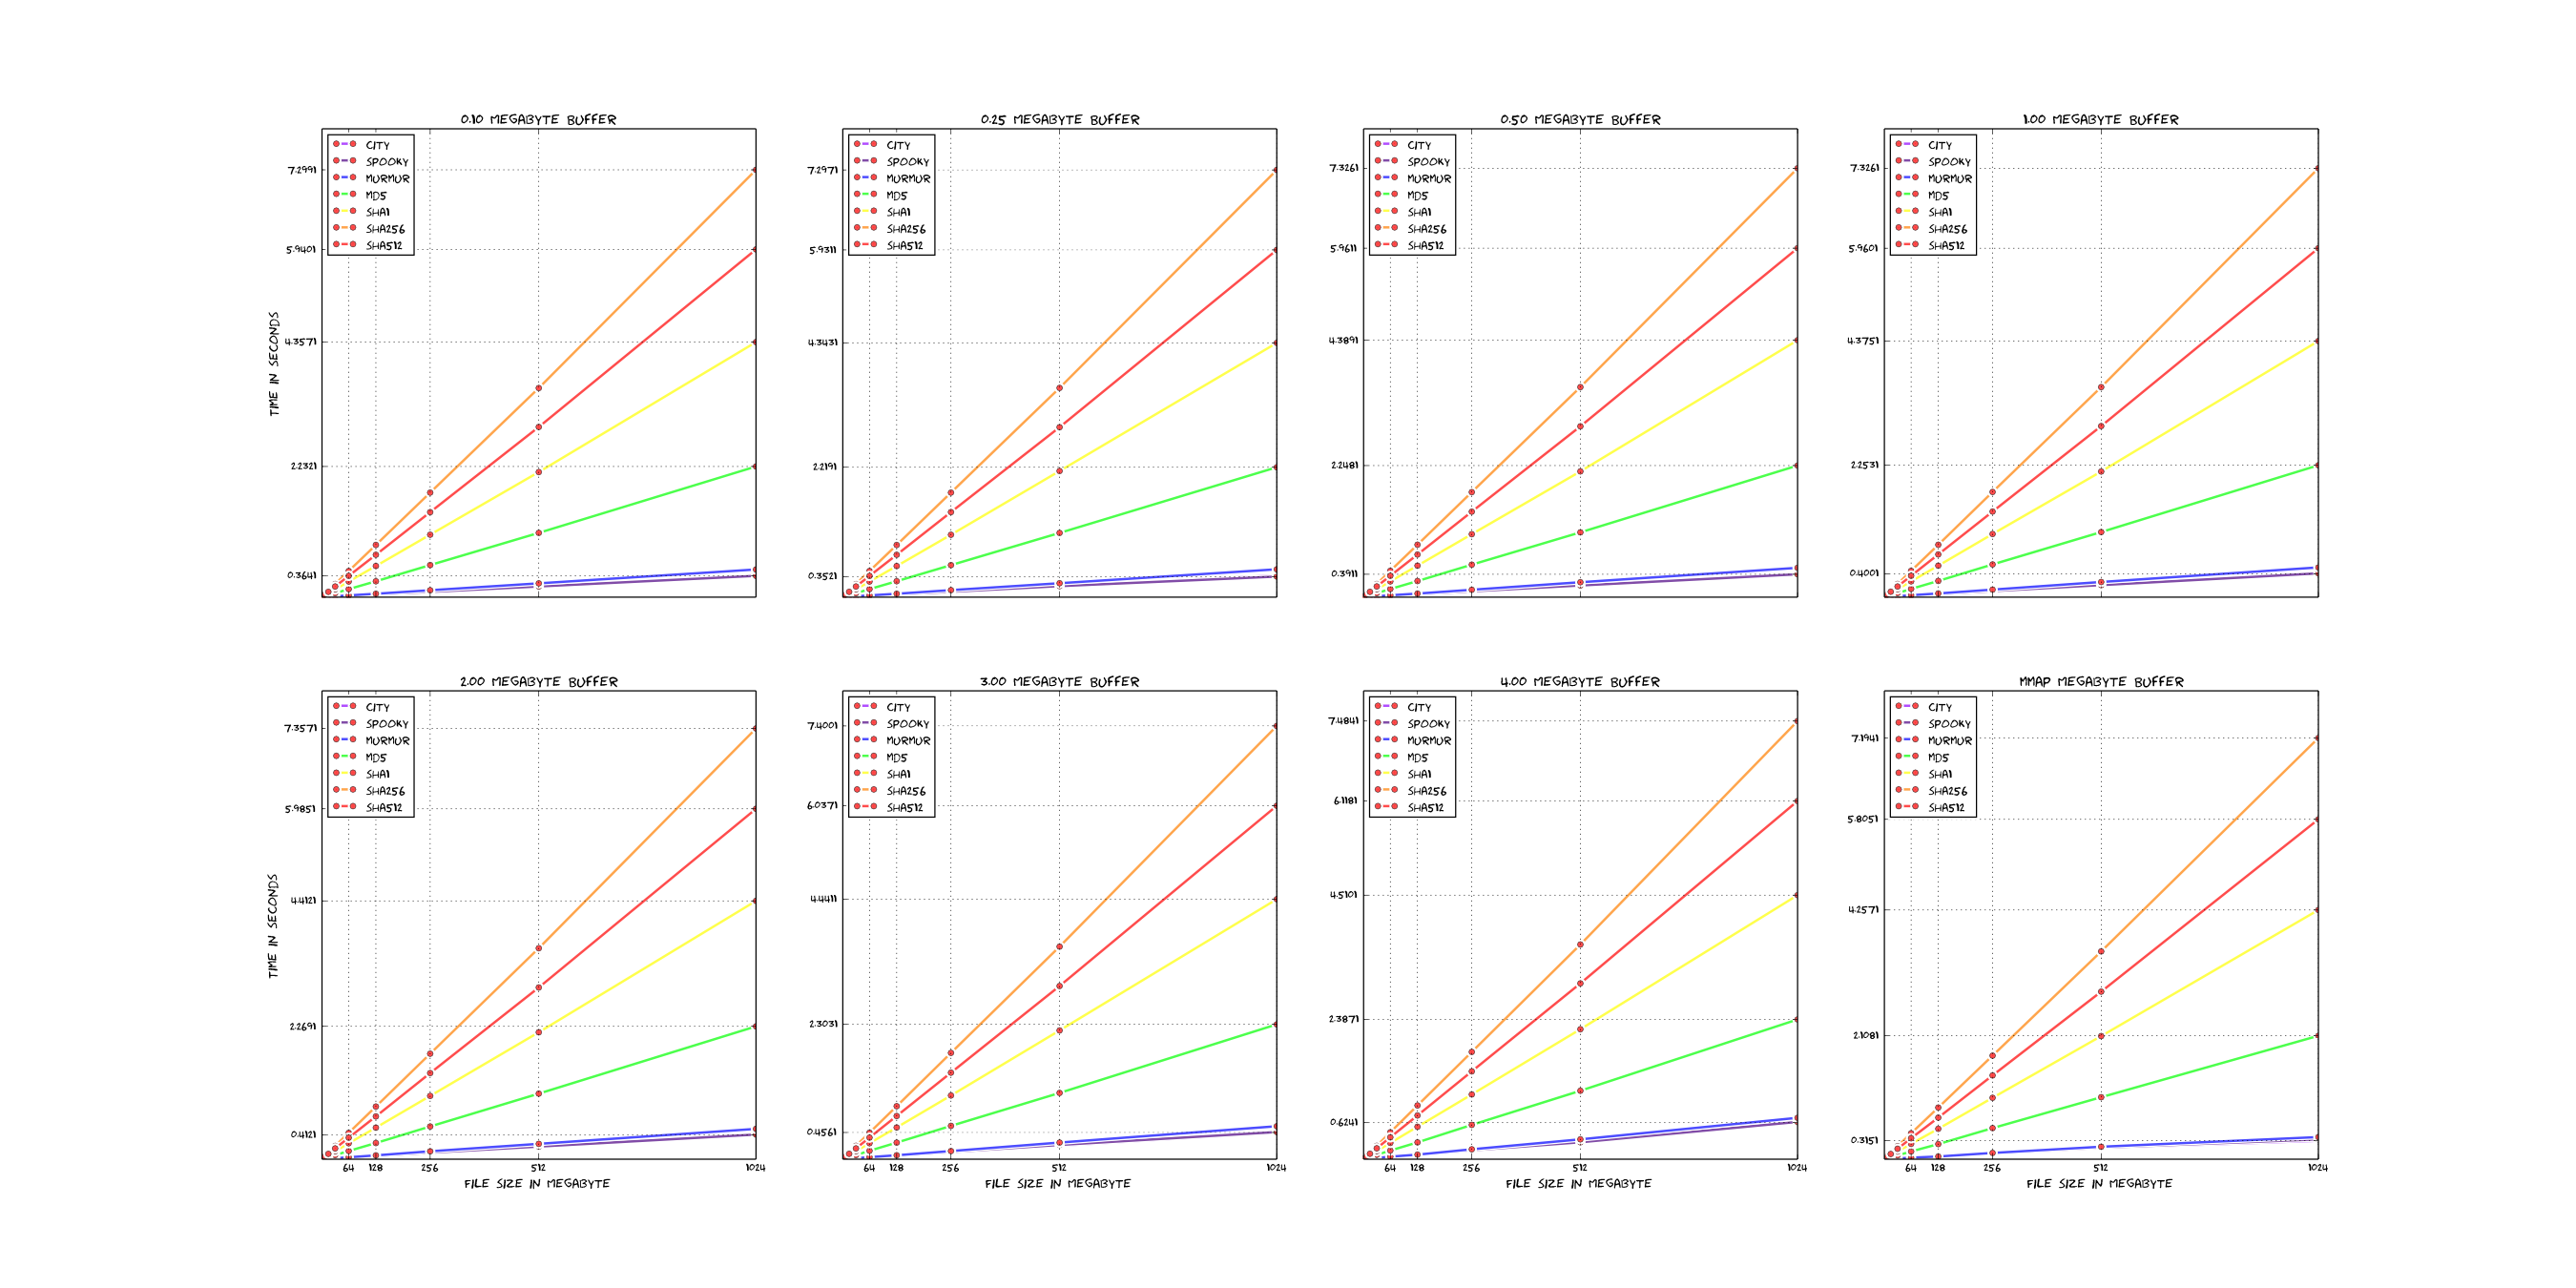
Here is a short comparison of the existing hashfunctions in rmlint (linear scale).
For reference: Those plots were rendered with these sources - which are very ugly, sorry.
If you want to add new hashfunctions, you should have some arguments why it is valuable and possibly even benchmark it with the above scripts to see if it’s really that much faster.
Also keep in mind that most of the time the hashfunction is not the bottleneck.
Optimizations¶
For sake of overview, here is a short list of optimizations implemented in rmlint:
Obvious ones¶
- Do not compare each file with each other by content, use a hashfunction to reduce comparison overhead drastically (introduces possibility of collisions though).
- Only compare files of same size with each other.
- Use incremental hashing, i.e. hash block-wise each size group and stop as soon a difference occurs or the file is read fully.
- Create one reading thread for each physical disk. This gives a big speedup if files are roughly evenly spread over multiple physical disks [note: currently using 2 reading threads per disk as a workaround for a speed regression but hoping to fix this for rmlint 2.5].
- Disk traversal is similarly multi-threaded, one thread per disk.
- Create separate hashing threads (one for each file) so that the reader threads don’t have to wait for hashing to catch up.
Subtle ones¶
- Check only executable files to be non-stripped binaries.
- Use
preadv(2)based reading for small speeedups. - Every thread in rmlint is shared, so only few calls to
pthread_createare made.
Insane ones¶
- Use
fiemap ioctl(2)to analyze the harddisk layout of each file, so each block can read it in perfect order on a rotational device. - Check the device ID of each file to see if it on a rotational (normal hard disks) or on a non-rotational device (like an SSD). On the latter the fiemap optimisation is bypassed.
- Use a common buffer pool for IO buffers and recycle used buffers to reduce memory allocation overheads.
- Use only one hashsum per group of same-sized files.
- Implement paranoia check using the same algorithm as the incremental hash. The
difference is that large chunks of the file are read and kept in memory instead
of just keeping the hash in memory. This avoids the need for a two-pass algorithm
(find matches using hashes then confirm via bytewise comparison). Each file is
read once only. This achieves bytewise comparison in O(N) time, even if there are
large clusters of same-size files. The downside is that it is somewhat memory-intensive
(can be configured by
--limit-memoption).
Translating rmlint¶
Rudimentary support for internationalization is provided via gettext.
Also see this Issue for a list of translators, current translations and a
wish-list of new translations.
Adding new languages¶
# Fork a new .po file from the po-template (here swedish):
$ msginit -i po/rmlint.pot -o po/se.po --locale se --no-translator
# Edit the po/se.po file, the format is self describing
$ vim po/se.po
# .po files need to be compiled, but that's handled by scons already.
$ scons
$ scons install
# You should see your changes now:
$ LANG=se ./rmlint
If you’d like to contribute your new translation you want to do a pull request (if you really dislike that, you may also send the translation to us via mail). Here is a small introduction on Pull Requests.
Updating existing languages¶
# Edit the file to your needs:
$ vim po/xy.po
# Install:
$ scons install
# Done
$ LANG=xy ./rmlint
Marking new strings for translations¶
If you want to mark strings in the C-code to be translated,
you gonna need to mark them so the xgettext can find it.
The latter tool goes through the source and creates a template file
with all translations left out.
/* Mark the string with the _() macro */
fprintf(out, _("Stuff is alright: %s\n"), (alright) ? "yes" : "no");
It gets a little harder when static strings need to be marked, since they cannot be translated during compile time. You have to mark them first and translate them at a later point:
static const char * stuff = _N("Hello World");
void print_world(void) {
printf("World is %s\n", _(stuff));
}
After you’re done with marking the new strings, you have to update the gettext files:
$ scons gettext
Then, proceed to work with the relevant *.po file as described above.
Benchmarks¶
This page contains the images that our benchmark suite renders for the current
release. Inside the benchmark suite, rmlint is challenged against other
popular and some less known duplicate finders. Apart from that a very dumb
duplicate finder called baseline.py is used to see how slow a program would
be that would blindly hash all files it finds. Luckily none of the programs is
that slow. We’ll allow us a few remarks on the plots, although we focus a bit
on rmlint. You’re of course free to interpret something different or re-run
the benchmarks on your own machine. The exact version of each program is given
in the plots.
Warning
This page is a little out of date. Help in updating it would be appreciated. The performance characteristics of rmlint have improved overall, but so might have other tools.
It should be noted that it is very hard to compare these tools, since each
tool investigated a slightly different amount of data and produces different
results on the dataset below. This is partly due to the fact that some tools
count empty files and hardlinks as duplicates, while rmlint does not. Partly
it might also be false positives, missed files or, in some tools, paths that
contain a ‘,’. For rmlint we verified that no false positives are in the
set.
Here are some statistics on the datasets /usr and /mnt/music. /usr
is on a btrfs filesystem that is located on an SSD with many small files,
while /mnt/music is located on a rotational disk with ext4 as
filesystem. The amount of available memory was 8GB.
$ du -hs /usr
7,8G /usr
$ du -hs /mnt/music
213G /mnt/music
$ find /usr -type f ! -empty | wc -l
284075
$ find /mnt/music -type f ! -empty | wc -l
37370
$ uname -a
Linux werkstatt 3.14.51-1-lts #1 SMP Mon Aug 17 19:21:08 CEST 2015 x86_64 GNU/Linux

Note: This plot uses logarithmic scaling for the time.
It should be noted that the first run is the most important run. At least for a
rather large amount of data (here 211 GB), it is unlikely that the file system
has all relevant files in its cache. You can see this with the second run of
baseline.py - when reading all files the cache won’t be useful at such large
file quantities. The other tools read only a partial set of files and can thus
benefit from caching on the second run. However rmlint (and also dupd)
support fast re-running (see rmlint-replay) which makes repeated runs very
fast. It is interesting to see rmlint-paranoid (no hash, incremental
byte-by-byte comparison) to be mostly equally fast as the vanilla rmlint.

rmlint has the highest CPU footprint here, mostly due to its multithreaded
nature. Higher CPU usage is not a bad thing since it might indicate that the program
spends more time hashing files instead of switching between hashing and reading.
dupd seems to be pretty efficient here, especially on re-runs.
rmlint-replay has a high CPU usage here, but keep in mind that it does
(almost) no IO and only has to repeat previous outputs.

The most memory efficient program here seems to be rdfind which uses even
less than the bare bone baseline.py (which does not much more than holding a
hashtable). The well known fdupes is also low on memory footprint.
Before saying that the paranoid mode of rmlint is a memory hog, it should be
noted (since this can’t be seen on those plots) that the memory consumption
scales very well. Partly because rmlint saves all paths in a Trie, making
it usable for \(\geq\) 5M files. Also it is able to control the amount of
memory it uses (--limit-mem). Due to the high amount of internal data
structures it however has a rather large base memory footprint.
dupd uses direct file comparison for groups of two and three files and hash
functions for the rest. It seems to have a rather high memory footprint in any
case.
| fdupes | rmlint | rmlint-paranoid | rmlint-replay | rmlint-v2.2.2 | rmlint-v2.2.2-paranoid | rmlint-xxhash | rmlint-old | dupd | baseline.py | |
|---|---|---|---|---|---|---|---|---|---|---|
| Duplicates | 27.203k | 27.203k | 27.203k | 27.203k | 27.203k | 27.203k | 27.203k | 39.656k | 43.217k | 67.931k |
| Originals | 16.115k | 16.115k | 16.115k | 16.115k | 16.115k | 16.115k | 16.115k | 15.133k | 16.109k | 22.848k |
Surprisingly each tool found a different set of files. As stated above, direct
comparison may not be possible here. For most tools except rdfind and
baseline.py it’s about in the same magnitude of files. fdupes seems to
find about the same amount as rmlint (with small differences).
The reasons for this are not clear yet, but we’re looking at it currently.
User benchmarks¶
If you like, you can add your own benchmarks below. Maybe include the following information:
rmlint --versionuname -aor similar.- Hardware setup, in particular the filesystem.
- The summary printed by
rmlintin the end. - Did it match your expectations?
If you have longer output you might want to use a pastebin like gist.
rmlint¶
find duplicate files and other space waste efficiently¶
SYNOPSIS¶
rmlint [TARGET_DIR_OR_FILES …] [//] [TAGGED_TARGET_DIR_OR_FILES …] [-] [OPTIONS]
DESCRIPTION¶
rmlint finds space waste and other broken things on your filesystem.
It’s main focus lies on finding duplicate files and directories.
It is able to find the following types of lint:
- Duplicate files and directories (and as a by-product unique files).
- Nonstripped Binaries (Binaries with debug symbols; needs to be explicitly enabled).
- Broken symbolic links.
- Empty files and directories (also nested empty directories).
- Files with broken user or group id.
rmlint itself WILL NOT DELETE ANY FILES. It does however produce executable
output (for example a shell script) to help you delete the files if you want
to. Another design principle is that it should work well together with other
tools like find. Therefore we do not replicate features of other well know
programs, as for example pattern matching and finding duplicate filenames.
However we provide many convenience options for common use cases that are hard
to build from scratch with standard tools.
In order to find the lint, rmlint is given one or more directories to traverse.
If no directories or files were given, the current working directory is assumed.
By default, rmlint will ignore hidden files and will not follow symlinks (see
Traversal Options). rmlint will first find “other lint” and then search
the remaining files for duplicates.
rmlint tries to be helpful by guessing what file of a group of duplicates
is the original (i.e. the file that should not be deleted). It does this by using
different sorting strategies that can be controlled via the -S option. By
default it chooses the first-named path on the commandline. If two duplicates
come from the same path, it will also apply different fallback sort strategies
(See the documentation of the -S strategy).
This behaviour can be also overwritten if you know that a certain directory
contains duplicates and another one originals. In this case you write the
original directory after specifying a single // on the commandline.
Everything that comes after is a preferred (or a “tagged”) directory. If there
are duplicates from an unpreferred and from a preferred directory, the preferred
one will always count as original. Special options can also be used to always
keep files in preferred directories (-k) and to only find duplicates that
are present in both given directories (-m).
We advise new users to have a short look at all options rmlint has to
offer, and maybe test some examples before letting it run on productive data.
WRONG ASSUMPTIONS ARE THE BIGGEST ENEMY OF YOUR DATA. There are some extended
example at the end of this manual, but each option that is not self-explanatory
will also try to give examples.
OPTIONS¶
General Options¶
-T --types="list" (default: defaults): | |
|---|---|
Configure the types of lint rmlint will look for. The list string is a comma-separated list of lint types or lint groups (other separators like semicolon or space also work though). One of the following groups can be specified at the beginning of the list:
Any of the following lint types can be added individually, or deselected by prefixing with a -:
WARNING: It is good practice to enclose the description in single or double quotes. In obscure cases argument parsing might fail in weird ways, especially when using spaces as separator. Example: $ rmlint -T "df,dd" # Only search for duplicate files and directories
$ rmlint -T "all -df -dd" # Search for all lint except duplicate files and dirs.
|
|
-o --output=spec / -O --add-output=spec (default: -o sh:rmlint.sh -o pretty:stdout -o summary:stdout -o json:rmlint.json): | |
Configure the way If Examples: $ rmlint -o json # Stream the json output to stdout
$ rmlint -O csv:/tmp/rmlint.csv # Output an extra csv fle to /tmp
|
|
-c --config=spec[=value] (default: none): | |
Configure a format. This option can be used to fine-tune the behaviour of the existing formatters. See the Formatters section for details on the available keys. If the value is omitted it is set to a value meaning “enabled”. Examples: $ rmlint -c sh:link # Smartly link duplicates instead of removing
$ rmlint -c progressbar:fancy # Use a different theme for the progressbar
|
|
-z --perms[=[rwx]] (default: no check): | |
Only look into file if it is readable, writable or executable by the current user. Which one of the can be given as argument as one of “rwx”. If no argument is given, “rw” is assumed. Note that r does basically
nothing user-visible since By default this check is not done.
|
|
-a --algorithm=name (default: blake2b): | |
Choose the algorithm to use for finding duplicate files. The algorithm can be either paranoid (byte-by-byte file comparison) or use one of several file hash algorithms to identify duplicates. The following hash families are available (in approximate descending order of cryptographic strength): sha3, blake, sha, highway, md metro, murmur, xxhash The weaker hash functions still offer excellent distribution properties, but are potentially more vulnerable to malicious crafting of duplicate files. The full list of hash functions (in decreasing order of checksum length) is: 512-bit: blake2b, blake2bp, sha3-512, sha512 384-bit: sha3-384, 256-bit: blake2s, blake2sp, sha3-256, sha256, highway256, metro256, metrocrc256 160-bit: sha1 128-bit: md5, murmur, metro, metrocrc 64-bit: highway64, xxhash. The use of 64-bit hash length for detecting duplicate files is not recommended, due to the probability of a random hash collision. |
|
-p --paranoid / -P --less-paranoid (default): | |
Increase or decrease the paranoia of
|
|
-v --loud / -V --quiet: | |
Increase or decrease the verbosity. You can pass these options several
times. This only affects |
|
-g --progress / -G --no-progress (default): | |
Show a progressbar with sane defaults. Convenience shortcut for NOTE: This flag clears all previous outputs. If you want additional
outputs, specify them after this flag using |
|
-D --merge-directories (default: disabled): | |
Makes rmlint use a special mode where all found duplicates are collected and
checked if whole directory trees are duplicates. Use with caution: You
always should make sure that the investigated directory is not modified
during IMPORTANT: Definition of equal: Two directories are considered equal by
Output is deferred until all duplicates were found. Duplicate directories are printed first, followed by any remaining duplicate files that are isolated or inside of any original directories. –rank-by applies for directories too, but ‘p’ or ‘P’ (path index) has no defined (i.e. useful) meaning. Sorting takes only place when the number of preferred files in the directory differs. NOTES:
|
|
-j --honour-dir-layout (default: disabled): | |
Only recognize directories as duplicates that have the same path layout. In
other words: All duplicates that build the duplicate directory must have
the same path from the root of each respective directory.
This flag makes no sense without |
|
-y --sort-by=order (default: none): | |
During output, sort the found duplicate groups by criteria described by order. order is a string that may consist of one or more of the following letters:
The letter may also be written uppercase (similar to |
|
-w --with-color (default) / -W --no-with-color: | |
Use color escapes for pretty output or disable them.
If you pipe rmlints output to a file |
|
-h --help / -H --show-man: | |
Show a shorter reference help text ( |
|
--version: | Print the version of rmlint. Includes git revision and compile time features. Please include this when giving feedback to us. |
Traversal Options¶
-s --size=range (default: “1”): | |
|---|---|
Only consider files as duplicates in a certain size range. The format of range is min-max, where both ends can be specified as a number with an optional multiplier. The available multipliers are:
The size format is about the same as dd(1) uses. A valid example would be: “100KB-2M”. This limits duplicates to a range from 100 Kilobyte to 2 Megabyte. It’s also possible to specify only one size. In this case the size is
interpreted as “bigger or equal”. If you want to filter for files
up to this size you can add a Edge case: The default excludes empty files from the duplicate search.
Normally these are treated specially by
|
|
-d --max-depth=depth (default: INF): | |
Only recurse up to this depth. A depth of 1 would disable recursion and is equivalent to a directory listing. A depth of 2 would also consider all children directories and so on. |
|
-l --hardlinked (default) / --keep-hardlinked / -L --no-hardlinked: | |
Hardlinked files are treated as duplicates by default ( If –no-hardlinked is given, only one file (of a set of hardlinked files) is considered, all the others are ignored; this means, they are not deleted and also not even shown in the output. The “highest ranked” of the set is the one that is considered. |
|
-f --followlinks / -F --no-followlinks / -@ --see-symlinks (default): | |
|
|
-x --no-crossdev / -X --crossdev (default): | |
Stay always on the same device ( |
|
-r --hidden / -R --no-hidden (default) / --partial-hidden: | |
Also traverse hidden directories? This is often not a good idea, since
directories like |
|
-b --match-basename: | |
Only consider those files as dupes that have the same basename. See also
|
|
-B --unmatched-basename: | |
Only consider those files as dupes that do not share the same basename.
See also |
|
-e --match-with-extension / -E --no-match-with-extension (default): | |
Only consider those files as dupes that have the same file extension. For
example two photos would only match if they are a |
|
-i --match-without-extension / -I --no-match-without-extension (default): | |
Only consider those files as dupes that have the same basename minus the file
extension. For example: |
|
-n --newer-than-stamp=<timestamp_filename> / -N --newer-than=<iso8601_timestamp_or_unix_timestamp>: | |
Only consider files (and their size siblings for duplicates) newer than a certain modification time (mtime). The age barrier may be given as seconds since the epoch or as ISO8601-Timestamp like 2014-09-08T00:12:32+0200.
Note that
Note: you can make rmlint write out a compatible timestamp with:
|
|
Original Detection Options¶
-k --keep-all-tagged / -K --keep-all-untagged: | |
|---|---|
Don’t delete any duplicates that are in tagged paths ( |
|
-m --must-match-tagged / -M --must-match-untagged: | |
Only look for duplicates of which at least one is in one of the tagged paths. (Paths that were named after //). Note that the combinations of |
|
-S --rank-by=criteria (default: pOma): | |
Sort the files in a group of duplicates into originals and duplicates by one or more criteria. Each criteria is defined by a single letter (except r and x which expect a regex pattern after the letter). Multiple criteria may be given as string, where the first criteria is the most important. If one criteria cannot decide between original and duplicate the next one is tried.
Alphabetical sort will only use the basename of the file and ignore its case.
One can have multiple criteria, e.g.: For more fine grained control, it is possible to give a regular expression
to sort by. This can be useful when you know a common fact that identifies
original paths (like a path component being To use the regular expression you simply enclose it in the criteria string
by adding <REGULAR_EXPRESSION> after specifying r or x. Example: Warning: When using r or x, try to make your regex to be as specific
as possible! Good practice includes adding a Tips:
|
|
Caching¶
--replay: | Read an existing json file and re-output it. When This is very useful if you want to reformat, refilter or resort the output
you got from a previous run. Usage is simple: Just pass If you want to view only the duplicates of certain subdirectories, just pass them on the commandline as usual. The usage of By design, some options will not have any effect. Those are:
NOTE: In |
|---|---|
-C --xattr: | Shortcut for See the individual options below for more details and some examples. |
--xattr-read / --xattr-write / --xattr-clear: | |
Read or write cached checksums from the extended file attributes. This feature can be used to speed up consecutive runs. CAUTION: This could potentially lead to false positives if file contents are somehow modified without changing the file modification time. rmlint uses the mtime to determine the modification timestamp if a checksum is outdated. This is not a problem if you use the clone or reflink operation on a filesystem like btrfs. There an outdated checksum entry would simply lead to some duplicate work done in the kernel but would do no harm otherwise. NOTE: Many tools do not support extended file attributes properly, resulting in a loss of the information when copying the file or editing it. NOTE: You can specify Usage example: $ rmlint large_file_cluster/ -U --xattr-write # first run should be slow.
$ rmlint large_file_cluster/ --xattr-read # second run should be faster.
# Or do the same in just one run:
$ rmlint large_file_cluster/ --xattr
|
|
-U --write-unfinished: | |
Include files in output that have not been hashed fully, i.e. files that do
not appear to have a duplicate. Note that this will not include all files
that This is mainly useful in conjunction with If you want to output unique files, please look into the |
|
Rarely used, miscellaneous options¶
-t --threads=N (default: 16): | |
|---|---|
The number of threads to use during file tree traversal and hashing.
|
|
-u --limit-mem=size: | |
Apply a maximum number of memory to use for hashing and –paranoid.
The total number of memory might still exceed this limit though, especially
when setting it very low. In general The
|
|
-q --clamp-low=[fac.tor|percent%|offset] (default: 0) / -Q --clamp-top=[fac.tor|percent%|offset] (default: 1.0): | |
The argument can be either passed as factor (a number with a Only look at the content of files in the range of from This is useful in a few cases where a file consists of a constant sized header or footer. With this option you can just compare the data in between. Also it might be useful for approximate comparison where it suffices when the file is the same in the middle part. Example:
|
|
-Z --mtime-window=T (default: -1): | |
Only consider those files as duplicates that have the same content and the same modification time (mtime) within a certain window of T seconds. If T is 0, both files need to have the same mtime. For T=1 they may differ one second and so on. If the window size is negative, the mtime of duplicates will not be considered. T may be a floating point number. However, with three (or more) files, the mtime difference between two duplicates can be bigger than the mtime window T, i.e. several files may be chained together by the window. Example: If T is 1, the four files fooA (mtime: 00:00:00), fooB (00:00:01), fooC (00:00:02), fooD (00:00:03) would all belong to the same duplicate group, although the mtime of fooA and fooD differs by 3 seconds. |
|
--with-fiemap (default) / --without-fiemap: | |
Enable or disable reading the file extents on rotational disk in order to optimize disk access patterns. If this feature is not available, it is disabled automatically. |
|
FORMATTERS¶
csv: Output all found lint as comma-separated-value list.Available options:
- no_header: Do not write a first line describing the column headers.
- unique: Include unique files in the output.
sh: Output all found lint as shell script This formatter is activatedas default.
available options:
cmd: Specify a user defined command to run on duplicates. The command can be any valid
/bin/sh-expression. The duplicate path and original path can be accessed via"$1"and"$2". The command will be written to theuser_commandfunction in thesh-file produced by rmlint.handler Define a comma separated list of handlers to try on duplicate files in that given order until one handler succeeds. Handlers are just the name of a way of getting rid of the file and can be any of the following:
clone: For reflink-capable filesystems only. Try to clone both files with the FIDEDUPERANGEioctl(3p)(or BTRFS_IOC_FILE_EXTENT_SAME on older kernels). This will free up duplicate extents. Needs at least kernel 4.2. Use this option when you only have read-only access to a btrfs filesystem but still want to deduplicate it. This is usually the case for snapshots.reflink: Try to reflink the duplicate file to the original. See also--reflinkinman 1 cp. Fails if the filesystem does not support it.hardlink: Replace the duplicate file with a hardlink to the original file. The resulting files will have the same inode number. Fails if both files are not on the same partition. You can usels -ito show the inode number of a file andfind -samefile <path>to find all hardlinks for a certain file.symlink: Tries to replace the duplicate file with a symbolic link to the original. This handler never fails.remove: Remove the file usingrm -rf. (-rfor duplicate dirs). This handler never fails.usercmd: Use the provided user defined command (-c sh:cmd=something). This handler never fails.
Default is
remove.link: Shortcut for
-c sh:handler=clone,reflink,hardlink,symlink. Use this if you are on a reflink-capable system.hardlink: Shortcut for
-c sh:handler=hardlink,symlink. Use this if you want to hardlink files, but want to fallback for duplicates that lie on different devices.symlink: Shortcut for
-c sh:handler=symlink. Use this as last straw.
json: Print a JSON-formatted dump of all found reports. Outputs all lint as a json document. The document is a list of dictionaries, where the first and last element is the header and the footer. Everything between are data-dictionaries.Available options:
- unique: Include unique files in the output.
- no_header=[true|false]: Print the header with metadata (default: true)
- no_footer=[true|false]: Print the footer with statistics (default: true)
- oneline=[true|false]: Print one json document per line (default: false)
This is useful if you plan to parse the output line-by-line, e.g. while
rmlintis sill running.
This formatter is extremely useful if you’re in need of scripting more complex behaviour, that is not directly possible with rmlint’s built-in options. A very handy tool here is
jq. Here is an example to output all original files directly from armlintrun:$ rmlint -o | json jq -r '.[1:-1][] | select(.is_original) | .path'py: Outputs a python script and a JSON document, just like the json formatter. The JSON document is written to.rmlint.json, executing the script will make it read from there. This formatter is mostly intended for complex use-cases where the lint needs special handling that you define in the python script. Therefore the python script can be modified to do things standardrmlintis not able to do easily.uniques: Outputs all unique paths found during the run, one path per line. This is often useful for scripting purposes.Available options:
- print0: Do not put newlines between paths but zero bytes.
stamp:Outputs a timestamp of the time
rmlintwas run. See also the--newer-thanand--newer-than-stampfile option.Available options:
- iso8601=[true|false]: Write an ISO8601 formatted timestamps or seconds since epoch?
progressbar: Shows a progressbar. This is meant for use with stdout or stderr [default].See also:
-g(--progress) for a convenience shortcut option.Available options:
- update_interval=number: Number of milliseconds to wait between updates. Higher values use less resources (default 50).
- ascii: Do not attempt to use unicode characters, which might not be supported by some terminals.
- fancy: Use a more fancy style for the progressbar.
pretty: Shows all found items in realtime nicely colored. This formatter is activated as default.summary: Shows counts of files and their respective size after the run. Also list all written output files.fdupes: Prints an output similar to the popular duplicate finder fdupes(1). At first a progressbar is printed on stderr. Afterwards the found files are printed on stdout; each set of duplicates gets printed as a block separated by newlines. Originals are highlighted in green. At the bottom a summary is printed on stderr. This is mostly useful for scripts that were set up for parsing fdupes output. We recommend thejsonformatter for every other scripting purpose.Available options:
- omitfirst: Same as the
-f / --omitfirstoption infdupes(1). Omits the first line of each set of duplicates (i.e. the original file. - sameline: Same as the
-1 / --samelineoption infdupes(1). Does not print newlines between files, only a space. Newlines are printed only between sets of duplicates.
- omitfirst: Same as the
OTHER STAND-ALONE COMMANDS¶
rmlint --gui: | Start the optional graphical frontend to This will only work when The gui has its own set of options, see |
|---|---|
rmlint --hash [paths...]: | |
Make |
|
rmlint --equal [paths...]: | |
Check if the paths given on the commandline all have equal content. If all
paths are equal and no other error happened, rmlint will exit with an exit
code 0. Otherwise it will exit with a nonzero exit code. All other options
can be used as normal, but note that no other formatters ( Note: This even works for directories and also in combination with paranoid
mode (pass By default this will use hashing to compare the files and/or directories. |
|
rmlint --dedupe [-r] [-v|-V] <src> <dest>: | |
If the filesystem supports files sharing physical storage between multiple
files, and if This command is similar to Running with |
|
rmlint --is-reflink [-v|-V] <file1> <file2>: | |
Tests whether
|
|
EXAMPLES¶
This is a collection of common use cases and other tricks:
Check the current working directory for duplicates.
$ rmlintShow a progressbar:
$ rmlint -gQuick re-run on large datasets using different ranking criteria on second run:
$ rmlint large_dir/ # First run; writes rmlint.json$ rmlint --replay rmlint.json large_dir -S MaDMerge together previous runs, but prefer the originals to be from
b.jsonand make sure that no files are deleted fromb.json:$ rmlint --replay a.json // b.json -kSearch only for duplicates and duplicate directories
$ rmlint -T "df,dd" .Compare files byte-by-byte in current directory:
$ rmlint -pp .Find duplicates with same basename (excluding extension):
$ rmlint -eDo more complex traversal using
find(1).$ find /usr/lib -iname '*.so' -type f | rmlint - # find all duplicate .so files$ find /usr/lib -iname '*.so' -type f -print0 | rmlint -0 # as above but handles filenames with newline character in them$ find ~/pics -iname '*.png' | ./rmlint - # compare png files onlyLimit file size range to investigate:
$ rmlint -s 2GB # Find everything >= 2GB$ rmlint -s 0-2GB # Find everything < 2GBOnly find writable and executable files:
$ rmlint --perms wxReflink if possible, else hardlink duplicates to original if possible, else replace duplicate with a symbolic link:
$ rmlint -c sh:linkInject user-defined command into shell script output:
$ rmlint -o sh -c sh:cmd='echo "original:" "$2" "is the same as" "$1"'Use
shredto overwrite the contents of a file fully:$ rmlint -c 'sh:cmd=shred -un 10 "$1"'Use data as master directory. Find only duplicates in backup that are also in data. Do not delete any files in data:
$ rmlint backup // data --keep-all-tagged --must-match-taggedCompare if the directories a b c and are equal
$ rmlint --equal a b c && echo "Files are equal" || echo "Files are not equal"Test if two files are reflinks
$ rmlint --is-reflink a b && echo "Files are reflinks" || echo "Files are not reflinks".Cache calculated checksums for next run. The checksums will be written to the extended file attributes:
$ rmlint --xattrProduce a list of unique files in a folder:
$ rmlint -o uniquesProduce a list of files that are unique, including original files (“one of each”):
$ rmlint t -o json -o uniques:unique_files | jq -r '.[1:-1][] | select(.is_original) | .path' | sort > original_files$ cat unique_files original_filesSort files by a user-defined regular expression
# Always keep files with ABC or DEF in their basename, # dismiss all duplicates with tmp, temp or cache in their names # and if none of those are applicable, keep the oldest files instead. $ ./rmlint -S 'x<.*(ABC|DEF).*>X<.*(tmp|temp|cache).*>m' /some/path
Sort files by adding priorities to several user-defined regular expressions:
# Unlike the previous snippet, this one uses priorities: # Always keep files in ABC, DEF, GHI by following that particular order of # importance (ABC has a top priority), dismiss all duplicates with # tmp, temp, cache in their paths and if none of those are applicable, # keep the oldest files instead. $ rmlint -S 'r<.*ABC.*>r<.*DEF.*>r<.*GHI.*>R<.*(tmp|temp|cache).*>m' /some/path
PROBLEMS¶
- False Positives: Depending on the options you use, there is a very slight risk
of false positives (files that are erroneously detected as duplicate).
The default hash function (blake2b) is very safe but in theory it is possible for
two files to have then same hash. If you had 10^73 different files, all the same
size, then the chance of a false positive is still less than 1 in a billion.
If you’re concerned just use the
--paranoid(-pp) option. This will compare all the files byte-by-byte and is not much slower than blake2b (it may even be faster), although it is a lot more memory-hungry. - File modification during or after rmlint run: It is possible that a file
that
rmlintrecognized as duplicate is modified afterwards, resulting in a different file. If you use the rmlint-generated shell script to delete the duplicates, you can run it with the-poption to do a full re-check of the duplicate against the original before it deletes the file. When using-c sh:hardlinkor-c sh:symlinkcare should be taken that a modification of one file will now result in a modification of all files. This is not the case for-c sh:reflinkor-c sh:clone. Use-c sh:linkto minimise this risk.
SEE ALSO¶
Reading the manpages o these tools might help working with rmlint:
- find(1)
- rm(1)
- cp(1)
Extended documentation and an in-depth tutorial can be found at:
BUGS¶
If you found a bug, have a feature requests or want to say something nice, please visit https://github.com/sahib/rmlint/issues.
Please make sure to describe your problem in detail. Always include the version
of rmlint (--version). If you experienced a crash, please include
at least one of the following information with a debug build of rmlint:
gdb --ex run -ex bt --args rmlint -vvv [your_options]valgrind --leak-check=no rmlint -vvv [your_options]
You can build a debug build of rmlint like this:
git clone git@github.com:sahib/rmlint.gitcd rmlintscons GDB=1 DEBUG=1sudo scons install # Optional
LICENSE¶
rmlint is licensed under the terms of the GPLv3.
See the COPYRIGHT file that came with the source for more information.
PROGRAM AUTHORS¶
rmlint was written by:
- Christopher <sahib> Pahl 2010-2017 (https://github.com/sahib)
- Daniel <SeeSpotRun> T. 2014-2017 (https://github.com/SeeSpotRun)
Also see the http://rmlint.rtfd.org for other people that helped us.
If you consider a donation you can use Flattr or buy us a beer if we meet:
The Changelog is also updated with new and futures features, fixes and overall changes.
Authors¶
rmlint was and is written by:
| Christopher Pahl | https://github.com/sahib | 2010-2019 |
| Daniel Thomas | https://github.com/SeeSpotRun | 2014-2019 |
Additional thanks to:
|
|
|
Donations¶
If you think rmlint saved [*] you some serious time and/or space, you might consider a donation. You can donate either via Flattr or via PayPal:
Or just buy us a beer if we ever meet. Nice emails are okay too.
| [*] | If it freed you from your beloved data: Sorry. [†] |
| [†] | Please file a bug or read the source and provide a patch. [‡] |
| [‡] | For more than 100GB of data loss we owe you one beer. [§] |
| [§] | If you don’t like beer or there’s only Budweiser available, you can order a Club Mate. |